Hello friends!
We had SNOW here yesterday (ok a passing snow flurry, but it counts when you love snow as much as I do!)...so this Veterans' Day I am not only thankful to all those who serve in our armed forces, but also thankful for the beautiful weather we had to celebrate it in!!
Today I am going to share with you a tutorial I made so you will hopefully be inspired to make some yourself. These are not a fragile little paper ornament, but really are a nice, substantial gift!! Here's the first one I made for you today and the tutorial will follow (BE SURE TO COMMENT HERE and/or ON OUR FACEBOOK PAGE...YOU'LL SEE THE GREAT PRIZE AT THE END OF THIS POST!):
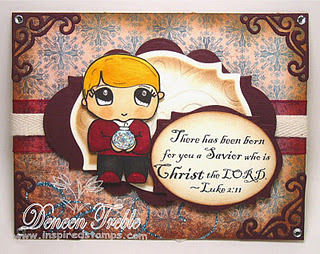
This is the finished ornament. You can see the dimension of it at the photo at the top of this post. I used the MILITARY stamp set for the sentiment and His Little Ones: Soldier Boy with Flag stamp set from the Inspired Stamps online store. Colored with Copics and inked with Distress Inks. Wanna see how easy it is to make one?
Double Rosette Ornament:
You'll need: Martha Steward Score Board (or your scored cutting tool and a stylus will work too)
4 pieces of patterned paper (1.5inches wide by 12 inches long)
4 pieces of patterned paper (1 inch wide by 12 inches long)
hot glue gun
string or twine of your choice to hang it
Decorations (stamps: like I have with the sample)
Step 1: Score each piece (yup all 8) at every half inch as shown:
Step 2: Fan fold on the 1/2 inch marks like shown above and below...
until you get this:
Step 3: Glue each piece end to end of the same pattern paper (so all the 1.5 inch strips together; then all the 1 inch strips together):
You'll glue the top piece of the long strip to the bottom like this so it's a large circle.
Step 4:Now the hardest part, (but only awkward, not really difficult). You'll want to lay the inside down and form the rosette like this:
Step 5: Using Hot Glue, glue the inside circle (you can do the back if you aren't putting another one on top so your top stays 'clean') and HOLD IT FOR A COUPLE OF MINUTES:
(You can add the string at this point or wait)
Do the same to make your smaller one:
You have to hold it while it dries, making sure to get the Rosette adjusted like you want. Then glue the small one onto the top one and decorate as you like.
Here are some more samples:
The one above has a Spellbinders die cut along the back and the Scripture is also cut with a Spellbinder's die!
And here is the banner that hangs on one of my Inspired Stamps studio walls...these Rosettes are 3" wide!
You can also put simple stamps on the back of your Rosette (or even the front!)
LOTS of photos tonight, huh?
I hope this has inspired you to want to make these for yourself! I am going to have to get a day and just make a bunch of these for family and friends!!
GIVEAWAY TIME!! OK....Here's a Giveaway that is gonna help you to make these Rosettes. All you have to do to enter is LEAVE A COMMENT HERE ! Your chances increase if you ALSO leave a comment on our Facebook Post this weekend that shares the Rosettes....AND if you let your crafty friends know about our Giveaway and one of them wins, YOU'LL WIN AUTOMATICALLY TOO!! We will draw the winner's name from all the comments here and Facebook randomly on Monday, and you only have until FRIDAY to email your mailing address or this prize will go into the BIG GIVEAWAY at the end of the 12 Weeks of Inspired Christmas Creations!!
The Giveaway THIS week, our half-way point in the 12 Weeks of Inspired Christmas Creations, is:
An Inspired Stampset of YOUR choice PLUS a $20 Michaels gift card (so you can get your own Martha Stewart Score Board or if you already have one, some cute papers and strings/ribbons to use to make your own Rosettes!!)
So, enjoy your weekend and I look forward to reading your comment!!
Be the Blessing,
~Antoinette
www.inspiredstamps.com (40% off coupon can be found on the store website...good for only one more week!)