Sunday, November 9, 2014

1.5" Christmas Circle stamps with Kary!

Hello friends,
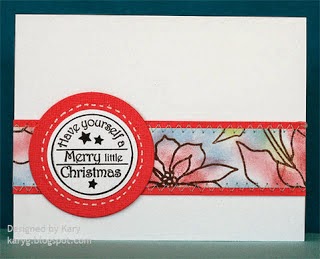
Today I wanted to share a few cards Kary has made that really showcase the 1.5" Christmas Circle Inspired Stamp set:
These are perfect to punch out with a punch (1.5" or 2" work great!) or stamp a bunch and run them through your BROTHER SCAN N CUT machine and you'll have lots of 1.5" Christmas Circles to use on your cards this year!!
Here's another card she made that I just love:

The inside has a verse from the CHRISTMAS POINSETTIA stamp set.  How perfect is that???

I made one a while back I thought I'd show too:
Be sure to head over to our online store soon if you are interested in purchasing this set.  Shipping is FREE on all US orders over $25 (outside US? we'll take $5 off your total shipping cost!) use coupon code: inspiredstampsFS  at our online store:  
 www.etsy.com/shop/GodblessyourART

I will be back all week with new artwork, and a cute tutorial on Tuesday!!
Blessings,
Antoinette


Saturday, November 8, 2014

Alcohol Ink background: Week 8 of our 12 WEEKS OF CHRISTMAS CARD TUTORIALS

Hello friends!
The STICKLES has finally dried on my Inspired Stamps: CHRISTMAS POINSETTIA stamp so I am ready to show you how to make a background using alcohol inks and your favorite Inspired Stamps!

First I gather my materials (these ALWAYS change, but I start of with a gathering of what I THINK I will use):
Our new store will carry the BO BUNNY papers as soon as we get them up (probably next week!): www.etsy.com/shop/GodblessyourART
I used glossy photo paper (any brand will do) for my alcohol inks...cheaper than the official paper for this, and you get a LOT more to play with in a pack!
I randomly ink my dauber and then twist my wrist as I go about applying this to the 3"x4" paper:
I then added a little cranberry (one of the colors I added that I had not begun with lol).  I chose to add this so my POINSETTIA stamp would look right with all this blue!
I cut the paper into 1 inch strips, then the other way in 1 inch intervals to produce 1" squares.  You can also just punch them :o)
Then I just want a little bit of white to surround the pieces so I go to the 1/8th space above
the 1inch line.
then glue each square (above) before gluing them to the background paper.
Add your Copic Color POINSETTIA and Inspired Stamps: CHRISTMAS SENTIMENTS stamp set and you have this card:
On TUESDAY I have another tutorial set for you that will take the alcohol ink background you learned here and do some TILE SCENERY with it...
Have a blessed weekend!
Antoinette
www.etsy.com/shop/GodblessyourART

Friday, November 7, 2014

6x8" Alphabet and HYMN LINE STAMPS now in the store!

Hello friends,
Just a quick note to THANK YOU for stopping by and checking out the new home of Inspired Stamps at our new online store: www.etsy.com/shop/GodblessyourART

We've just put up our line of HYMN LINE stamps--these are the 6x8" sets (our largest), as well as our 6x8" alphabet sheets so be sure to head over and check it out!  AND we just lowered shipping prices AGAIN!  Don't forget in November when you purchase $25, we will ship to all US addresses for FREE (outside of US we will take $5 off your shipping!)

I have 2 tutorials coming your way over the next few days (waiting for STICKLES to dry so I can finish these up--now THAT'S a wait LOL) as well as some more artwork!

Have a blessed evening and we'll be back with more artwork very soon!
Blessings,
Antoinette

Wednesday, November 5, 2014

New STAMP RELEASE + FREE SHIPPING!!

Hello Friends!
HAVE YOU SEEN OUR NEW ONLINE STORE YET?  Be sure to pop over after you see the new releases (which are already up and ready for purchase there!): 
Free US shipping on all orders $25 and up:  USE COUPON CODE:  inspiredstampsFS
https://www.etsy.com/shop/Godblessyourart


Today we have a WONDERFUL set of new stamps that can now be found in the new store!
The very talented Inspired Stamps Design Team has created some GORGEOUS cards using these new stamps for you today:
First up is a 4x6" stamp set called HYMN GIRLS: BANNER:
You can use her in MANY WAYS, and one way is to put a banner in her hands, as Kary shows here:
and Jamie shows here:
I just am crazy about that stamp set!!
Another one that has a ton of uses is the 3x4" HYMN GIRLS: ORNAMENTS (she could hold that package for any type of card, too!):
Here is Deneen's card using her:
and Belinda made her look more rustic with less ink in a blue card:
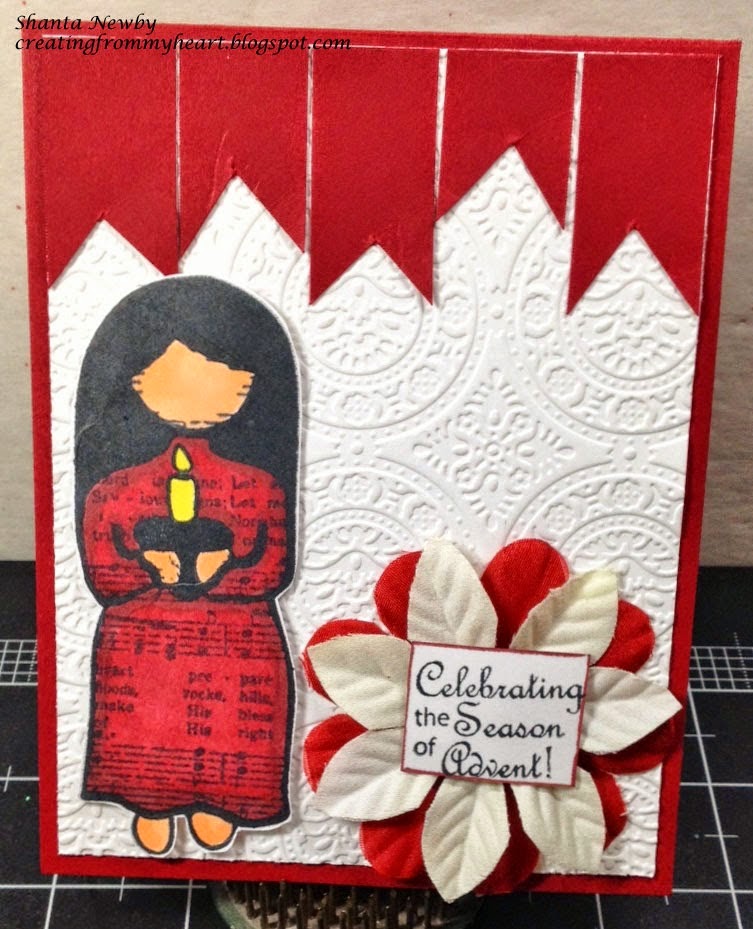
Up next is the HYMN GIRLS: LET YOUR LIGHT SHINE 3x4" stamp set:
Shanta used her in this sweet card:

 Chere also used her but chose to focus color only on the candle:
I love how one stamp can get such different results based on color placement!
Our last stamp will be the most versatile as you can put any sentiment or Scripture inside the sign the HYMN GIRLS: Girl Holding Sign is holding:
Here is Patty's pretty card using less ink to ink her, which fits so nicely with the background colors!  She added Isaiah 41:10, another Inspired Stamps stamp, to her:

Shanta also made a card using this set, but notice how different a look she gets with focusing on less color:
That red really makes Inspired Stamps 1 Thessalonians 5:16-18 (one of our $3.99 Single Scripture Stamps) pop and her solid application of black ink on the stamp set gives a nice crisp image! 

Such a lovely set of artwork from the Inspired Stamps Design Team today!  Be sure to head over to our BRAND NEW STORE and see all we have...I continue to add more stamps from our current line to the store daily as moving is quite a job, even when it's done online! 

Thank you so much for your support of Inspired Stamps and I'll be back with 2 tutorials for you soon!
Blessings and Thanks,
Antoinette and the Inspired Stamps DT     (coupon code for US FREE SHIPPING IS : inspiredstampsFS)
All out of the US orders will receive $5 off shipping by messaging me on etsy with your order so I can make a special listing for you!



Tuesday, November 4, 2014

Come see the NEW ONLINE SHOP!!

www.etsy.com/shop/Godblessyourart
Hello friends!

We are SO EXCITED to get to share with you our brand new store, where I will be putting handmade items as well as our entire line of photopolymer INSPIRED STAMPS exclusively beginning WEDNESDAY NOON!   It has taken a lot of time to get the current products transferred over so the Christmas Tutorials will happen both Friday and Saturday this week!

The new store is really exciting because we will be able to offer shipping costs much lower than on our original storefront!  We have it so that if you are OUTSIDE the US and want to purchase, you can send us a message with what you want to purchase and get a precise amount (again, much lower than we were able to offer before)!  We hope you will share our new store on your blogs and FB pages too and help us get the word out about the change of online store!!

NEW RELEASES will be uploaded to the new store tomorrow at NOON and we will have a post with all the wonderful Design Team artwork for you then as well.

Thank you SO MUCH for your support of Inspired Stamps!  We are so excited with the savings we can now pass on to you all!!

Blessings,
Antoinette
                                       CLICK on our new address here to go to the NEW store:


Thursday, October 30, 2014

Inspired Stamps online store is moving!! Any store credits must be used by Tuesday!


Hello friends!
BIG NEWS today here at Inspired Stamps!  We will be moving from our current online store address at www.inspiredstamps.com to a new address starting with our NEW STAMP RELEASE on WEDNESDAY NOVEMBER 5th (just a few days away)!  If you have a current store credit, these will expire at midnight EST on Tuesday November 4th and will not be able to be transferred to the new online store site!   This week's 12 WEEKS OF CHRISTMAS TUTORIALS will be shared on TUESDAY AFTERNOON along with our new store address (we are so excited and with much lower shipping costs, we know you will be too!)  Until Wednesday, our online store is up and running as usual: www.inspiredstamps.com

Today we have SCRIPTURE to share in the Design Team projects!
KARY starts us off with this lovely card:
Up next is SHANTA's stunningly creative card:
Deneen made this card we'd all love to receive!
Belinda has this beauty:
Jamie has several (she'll be teaching you this technique on her week of 12 Weeks of Christmas Card Tutorials):

And up next is Chere's candle creations...(she explains the process of how to do this on her blog!)


 These are so wonderful! 
Thank you for stopping by and be sure to come back over on Tuesday when I share the next tutorial and our new store site!! 
Blessings,
Antoinette and the DT
inspiredstamps.com  shipping most orders out the SAME DAY they are placed!

Friday, October 24, 2014

Card in a Box! 12 Weeks of Christmas Card Tutorials: Week 9 with Chere!

Hello everyone,  Today Chere has this great tutorial for you....Here's Chere:
Christmas is right around the corner and many of us are still looking for Christmas card and project ideas.  Well at the Inspired Stamps blog you will find a new idea each week, this week it is my turn to share a project tutorial.  Today I created a "card in a box" using the Shepherd boy and the standing sheep stamp and laying sheep stamp.  I stamped the sheep several times on cardstock and watercolored the images using distress markers.  There are several different versions of this "card in a box" on the internet, but I like this one the best because you can get two out of one 8.5 X 11 inch piece of cardstock.  You cut the 11 inch side in half, to get two pieces of 8.5 X 5.5 inches.
 Place 8.5 inch side on top fence of scoring tool and score at 2, 4. 6 and 8 inches.  Turn 90 degrees and score at 2 3/8 inches.  Now you will need two tabs for inside of box and these can come from your scrap pile (we all have one of those don't we?)  These are 3 X 1/2 inches, score each end of the 3 inch length at 1/2.  (It is easier to score at .5 inches and then flip around strip and score again at .5 inches).  Then you will fold one part toward the back and one part toward the front.  This is a Z-fold.  Apply sticky strip (strong adhesive) to the outside edges of scored piece to attach inside box.
 The box panel is folded and burnished on three sides.  (You want to keep fourth side upright, this will be your back panel, this is also where the sides are attached with strong adhesive. Cut up three of the score lines to create flaps (this is the shorter of the panels).
 The Z-fold strips are placed on the inside of the box.  It is easiest to use a strip with fold facing back panel and line up with the back edge, adhere, then line up side and fold box on side and burnish.  Repeat with strip toward the front of the box.  These pieces are needed for the box to have stability and to allow you to attach your embellishments.  I added pieces of BoBunny paper from the Christmas Collage collection.  The pieces were cut to 2 X 2.25 inches, adhere to 3 side panels, the back panel was a bit longer.
 I cut 1/4 inch strips to attach to back of my Shepherd and sheep to better attach them to the inside strips.  I also added some grass to these strips, since sheep are grazers and it helped mask the white strips.  I added Luke 2:11 to front flap and stars to back panel.
 More BoBunny Christmas Collage paper was added to bottom panels.
 The back of the box is where you can stamp your sentiment and write your personal message.  My sentiment came from the Christmas verses set.
 Here is the box folded flat.  When you are adding your embellishements you want to make sure they will not stick out the sides when folded flat, so that the card will still fit in a standard A2 envelope.  The card mails flat, but what a wonderful surprise for your recipient when the open up and see your creation.  I just love how fun these cards are to make and how happy they make the recipient.  I hope you enjoyed the tutorial and I hope you will give this card a try.  If you have any questions, please let me know.  Thank you so much for stopping by today and please be sure to check in often at the Inspired Stamps blog for more inspiration.