Hello friends!
Before we have our holiday weekend, I wanted to share with you another house scene I made with Scripture I wrote, plus a couple of Inspired Stamps (HLO: Journal Girl and a verse is just above her from the GUARD YOUR HEART stampsets). I incorporated collage, pan pastels and acrylics into this:
Here's a close up of HLO Journal Girl (colored with Copic Markers and some colored pencil). Above her you can see the GUARD YOUR HEART stamp set verse I used. The houses are collage and a mixture of acrylic and pan pastels.
I made a canvas with a similar feel to it so I can keep it on the wall (Used Inspired Stamps: HLO: Thankful Girl in and PRAYER sets stead on this one)as well as some jewels to act as clouds/stars in the sky :
Be sure to leave a comment if you can...I love to see who popped by over the holiday weekend!
Blessings,
Antoinette
The 20% off Coupon will work through Saturday night midnight at the online store: 20AUG at
Showing posts with label Prayer. Show all posts
Friday, August 30, 2013
Thursday, July 4, 2013
Stars and/or Stripes with the Inspired Stamps Design Team!
Hello friends!
Here in the USA we celebrate Independence Day today! So here on the blog we are creating cards with STARS and/or STRIPES to inspire you!
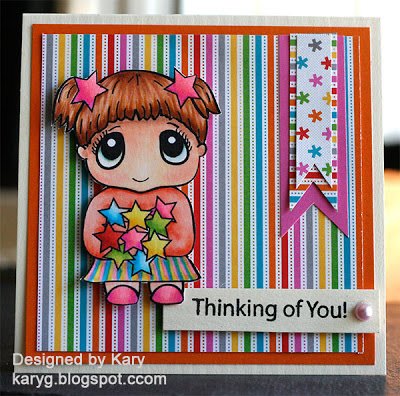
Kary starts us off with this adorable card:
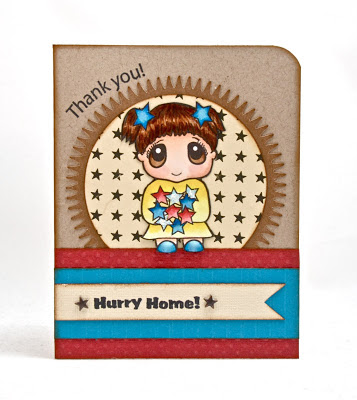
Chere's card:
Deneen's beautiful card:
We'll be back soon with more inspiration!
Blessings,
Antoinette and the Thursday Design Team
Here in the USA we celebrate Independence Day today! So here on the blog we are creating cards with STARS and/or STRIPES to inspire you!
Kary starts us off with this adorable card:
Chere's card:
Deneen's beautiful card:
Gaby's card:
Jenn's card:
Thanks so much ladies! These are all wonderful cards!We'll be back soon with more inspiration!
Blessings,
Antoinette and the Thursday Design Team
Thursday, May 23, 2013
Day 15 Stamping Mixed Media tutorial + DT THURSDAY characters!
Hello friends! Just 2 days until the Operation Write Home blog hop and we are getting ready!! Today is Day 15 of our 31 Days of Stamping Mixed media and I wanted to share a simple MASKING technique with you using our newest couple in the Inspired Stamps online store: His Little Ones: Bride and His Little Ones: Groom (Kary did the artwork above showing the finished product!):
First you stamp your bride (because she will be in front of his hand...whatever you want to appear IN FRONT is stamped first):
Then on blue sticky back paper (post it note with STICKY side where the groom will be) I stamp her again.
I only need to trim on the left side since his arm will come behind this side of her. Make sure to trim right up to the black lines.
Then ink up your stamp on a clear block and stamp him where you want him to stand next to her. See how his arm and part of his head stamps onto the blue sticky backed paper?
Ta Da! He looks like he's behind her. If you don't line it up perfectly, you'll see some 'white' between his arm and her veil. I usually just add some black line. Here's Kary's card and the rest of the DT for this week:
Kary:
Deneen's card using HLO: Summer Girl and Solid Alphabet LOWER cased stamps:
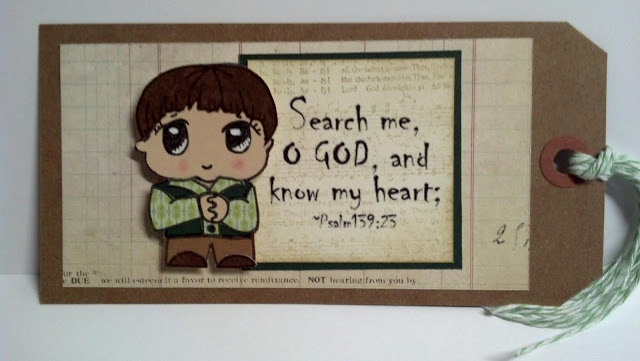
Jenn using HLO: Thankful boy, Background stamps, and Psalm 139:23:
Chere made this waterfall card using HLO: praying boy, James 1:2, and Prayer
Patty made her look a little rustic with less ink on her eyes using HLO:girl praying
MONDAY I have a great 2 minute tutorial for you using pan pastels and versamark that you'll not want to miss! Saturday is our bloghop with OWH and Sunday is another day with Gratitude Art!!
Have a great day!
Blessings,
Antoinette
First you stamp your bride (because she will be in front of his hand...whatever you want to appear IN FRONT is stamped first):
Then on blue sticky back paper (post it note with STICKY side where the groom will be) I stamp her again.
I only need to trim on the left side since his arm will come behind this side of her. Make sure to trim right up to the black lines.
Place the trimmed sticky note EXACTLY upon the original stamped paper (right on top of her on the white paper).
Ta Da! He looks like he's behind her. If you don't line it up perfectly, you'll see some 'white' between his arm and her veil. I usually just add some black line. Here's Kary's card and the rest of the DT for this week:
Kary:
Deneen's card using HLO: Summer Girl and Solid Alphabet LOWER cased stamps:
Jenn using HLO: Thankful boy, Background stamps, and Psalm 139:23:
Chere made this waterfall card using HLO: praying boy, James 1:2, and Prayer
Patty made her look a little rustic with less ink on her eyes using HLO:girl praying
MONDAY I have a great 2 minute tutorial for you using pan pastels and versamark that you'll not want to miss! Saturday is our bloghop with OWH and Sunday is another day with Gratitude Art!!
Have a great day!
Blessings,
Antoinette
Sunday, July 29, 2012
Sponsoring Stampin' Sisters in Christ Challenge: The Veil was torn...
Hello friends!
Today we are sponsoring the Stampin' Sisters in Christ Challenge! If you like challenge blogs (Or just love to learn Scripture like we do!) you should head over and check this blog out! We love the ladies there and what they do to promote an understanding of God's Word! We do our best to support them every chance we get and hope you will, too!
The verse focus for this challenge #150 is"The veil of the temple was torn in two from top to bottom." Matthew 27:51
Just a little piece of what PeggySue wrote that really does an excellent job of teaching this verse and the powerful significance of the temple veil being torn at Christ's crucifiction, she writes, "When Jesus willingly gave himself up as an atoning sacrifice on the cross, and took the weight of the sin of the world on his shoulders, he opened the way for anyone, Jew or Gentile, to enter into a relationship with God. He tore the veil in two—sin separates us from God no longer, as long as we accept that sacrifice."
The challenge is to use a torn paper technique in your artwork. I love the imagery of the very thick, heavy separating veil being torn at Christ's death, so I wanted to recreate a 'tearing' of 'curtain' look in my card, which uses Inspired Stamps ( EYE ON THE SPARROW, PRAYER, HLO: GIRL PRAYING, HIS CROSS), Bo Bunny paper, and CTMH embellishments for the most part:
Don't forget we have our 25%off SALE off your TOTAL PURCHASE of stamps JUST THROUGH WEDNESDAY!!
Head over to the online store by clicking:
www.inspiredstamps.com
We ship most orders SAME DAY they are placed!
Have a blessed day and we'll be back soon with more Inspired Stamps creations!
~Antoinette
Today we are sponsoring the Stampin' Sisters in Christ Challenge! If you like challenge blogs (Or just love to learn Scripture like we do!) you should head over and check this blog out! We love the ladies there and what they do to promote an understanding of God's Word! We do our best to support them every chance we get and hope you will, too!
The verse focus for this challenge #150 is"The veil of the temple was torn in two from top to bottom." Matthew 27:51
Just a little piece of what PeggySue wrote that really does an excellent job of teaching this verse and the powerful significance of the temple veil being torn at Christ's crucifiction, she writes, "When Jesus willingly gave himself up as an atoning sacrifice on the cross, and took the weight of the sin of the world on his shoulders, he opened the way for anyone, Jew or Gentile, to enter into a relationship with God. He tore the veil in two—sin separates us from God no longer, as long as we accept that sacrifice."
The challenge is to use a torn paper technique in your artwork. I love the imagery of the very thick, heavy separating veil being torn at Christ's death, so I wanted to recreate a 'tearing' of 'curtain' look in my card, which uses Inspired Stamps ( EYE ON THE SPARROW, PRAYER, HLO: GIRL PRAYING, HIS CROSS), Bo Bunny paper, and CTMH embellishments for the most part:
Don't forget we have our 25%off SALE off your TOTAL PURCHASE of stamps JUST THROUGH WEDNESDAY!! Head over to the online store by clicking:
www.inspiredstamps.com
We ship most orders SAME DAY they are placed!
Have a blessed day and we'll be back soon with more Inspired Stamps creations!
~Antoinette
Friday, December 2, 2011
Week #9 of our 12 Weeks of Inspired Christmas Creations Tutorial + giveaway!
Hello friends!
What a day! We just released the new December stamps into the Inspired Stamps Online store and they are flying off the 'shelf'!! All orders placed by 5pm are on their way to you!
Today I have one of the MOST fun gifts you will ever make! It is a mixed media photo frame and starts off like this:
I got a bunch of these at Hobby Lobby and I love the solid particle board frame! I painted it white with the acrylic paint show. I also used copic markers, distress inks and distress ink pads, plus assorted embellishments and these items:
Did I mention this is SUPER fun to make?!?
Ok first thing is to tear masking tape and put it around your frame. You can use clear tape too. I put the blue painters tape on the glass where the photo will go to protect it from all the stuff:
Then I glue down the pieces of fibers, cheesecloth, sequins, and other goodies to get this:
Ok at this point it looks like something a kindergarten child would toss in the trash and move on to something else, but hang in there! It's like the ugly duckling that hasn't grown into a swan yet. Put another thick layer of the glue and seal over it (you can use mod podge, but I prefer the glue and seal product by Tim Holz).
NOW let it dry (you need a few hours but overnight is best).
Next comes the ink:
make sure you are pouncing the ink and turning your ink applicator in different directions. Once its done it will look somewhat like this:
Honestly, this is the big WOW THATS COOL moment when you are creating, but seeing it in a photo may not be as powerful LOL.
This dries so fast and you are ready to take off the tape, add some embellishments and you are almost done:
and here's the final frame with some close ups:
Can you see how amazing the texture of the cheese cloth looks? I just LOVE this! Here's another color combo for you so you can see how dramatically different your ink choices make the finished product:
Do you notice there is more white in this one? I used craft glue and it resisted the ink more than the glue and seal did. But still a neat look.
Ok, so tell me what you think about this project? Anyone gonna give it a try? Leave your comment here and I will choose someone who will win one of the new particle board frames just like the one I used for these projects PLUS the 2 new His Little Ones: Winter Boy and Winter Girl stamp sets. You have until midnight Sunday!! Let your friends know...if they come comment and mention your name, then I choose them as a winner...you'll win the same prize they do, too, as a THANK YOU for sharing about us!!
Have a blessed weekend and I'll see you Monday!!
Be the Blessing,
~Antoinette
www.inspiredstamps.com (We ship every day but Sunday! We ship most orders the same day they are placed!)
What a day! We just released the new December stamps into the Inspired Stamps Online store and they are flying off the 'shelf'!! All orders placed by 5pm are on their way to you!
Today I have one of the MOST fun gifts you will ever make! It is a mixed media photo frame and starts off like this:
I got a bunch of these at Hobby Lobby and I love the solid particle board frame! I painted it white with the acrylic paint show. I also used copic markers, distress inks and distress ink pads, plus assorted embellishments and these items:
Did I mention this is SUPER fun to make?!?
Ok first thing is to tear masking tape and put it around your frame. You can use clear tape too. I put the blue painters tape on the glass where the photo will go to protect it from all the stuff:
Then I glue down the pieces of fibers, cheesecloth, sequins, and other goodies to get this:
Ok at this point it looks like something a kindergarten child would toss in the trash and move on to something else, but hang in there! It's like the ugly duckling that hasn't grown into a swan yet. Put another thick layer of the glue and seal over it (you can use mod podge, but I prefer the glue and seal product by Tim Holz).
NOW let it dry (you need a few hours but overnight is best).
Next comes the ink:
make sure you are pouncing the ink and turning your ink applicator in different directions. Once its done it will look somewhat like this:
Honestly, this is the big WOW THATS COOL moment when you are creating, but seeing it in a photo may not be as powerful LOL.
This dries so fast and you are ready to take off the tape, add some embellishments and you are almost done:
and here's the final frame with some close ups:
Can you see how amazing the texture of the cheese cloth looks? I just LOVE this! Here's another color combo for you so you can see how dramatically different your ink choices make the finished product:
Ok, so tell me what you think about this project? Anyone gonna give it a try? Leave your comment here and I will choose someone who will win one of the new particle board frames just like the one I used for these projects PLUS the 2 new His Little Ones: Winter Boy and Winter Girl stamp sets. You have until midnight Sunday!! Let your friends know...if they come comment and mention your name, then I choose them as a winner...you'll win the same prize they do, too, as a THANK YOU for sharing about us!!
Have a blessed weekend and I'll see you Monday!!
Be the Blessing,
~Antoinette
www.inspiredstamps.com (We ship every day but Sunday! We ship most orders the same day they are placed!)
Friday, October 21, 2011
12 Weeks of Inspired Christmas Creations: Week #3 BOX IT UP!
Hello Festive Friends!
Are you ready for ANOTHER week of our Inspired Christmas Creations? Today I have decorated boxes FILLED with cards---a great gift idea (who wouldn't send more cards if they were already made and organized in an adorable box?).
Here are the boxes I made (one for a man and one for a woman)...I got the boxes at Hobby Lobby and didn't get the brand name so I will come back and update that info once I get back over there:
Here's how I made them:
Using the Inspired Stamps 6x8 Colorable Letters and my Copic Markers I stamped directly to the top with Momento black ink on the man's box and onto paper for a softer look with the woman's box:
I used the sponging tool with the tea dye Distress ink around the entire boxes edges.
Then I stamp my pieces (I used the stitching and verse from the Bind and Stitch set..I love the way the stitches are so crisp!!)
Next I stamped and colored His Little Ones: Praying Boy and His Little Ones: Praying Girl using Copic Markers and cut them out (I wanted their outfits to look fuzzy, so I took the colorless blender solution on a paper towel and dabbed them after I colored them):
Next, I used some left over Petaloo flowers, ctmh opaques, and Michael's ribbon to glue all the items on the boxes:
Now for the inside, this clever box comes with dividers (yes!) and was ready for the cards I had made to fill it with (here are a few samples of those):
So what do you think? Is this a project YOU might do for a Christmas Gift? Remember to Leave a comment to THIS POST and/or on our FACEBOOK page to be automatically entered in our Giveaway! Those prizes that are NOT claimed will all be added into a FINAL GIVEAWAY prize package that will be worth over $100!! So make sure you are commenting each week! You have until SUNDAY MIDNIGHT to comment!
SPEAKING OF CHRISTMAS AND GIVEAWAYS....
GUESS WHO WON OUR DESIGN CONTEST FOR THE NEW Christmas His Little One's stamp set?!!
We actually chose 2 winners, as I used ideas from both of them to make not only HLO stamps but a new full-sized Winter Ruth character, that has the ability to hold several different items!! I can't wait to share these with you but before that, I'm sure you wanna know who won the Free sets!!
Belinda K----You inspired a 4x6 set called Winter Ruth, with a brand new full size character Ruth!! You wanted a character that has the ability to hold different items, and you got it!
and our HLO: Christmas Boy winner goes to...
Jamie M---You suggested Him holding a Christmas ornament (and I've drawn him this morning doing just that!)
Thanks to everyone who gave ideas both here and on Facebook!
NOW DON'T FORGET TO COMMENT HERE TO BE ENTERED TO WIN A PRIZE THAT INCLUDES ITEMS FROM THIS WEEK'S INSPIRED CHRISTMAS CREATION!!
I'll be back Monday to announce the winner!
Be the Blessing!
~Antoinette
www.inspiredstamps.com (Shop our online store: We are shipping most orders the SAME DAY as you place it!)
Are you ready for ANOTHER week of our Inspired Christmas Creations? Today I have decorated boxes FILLED with cards---a great gift idea (who wouldn't send more cards if they were already made and organized in an adorable box?).
Here are the boxes I made (one for a man and one for a woman)...I got the boxes at Hobby Lobby and didn't get the brand name so I will come back and update that info once I get back over there:
Here's how I made them:
Using the Inspired Stamps 6x8 Colorable Letters and my Copic Markers I stamped directly to the top with Momento black ink on the man's box and onto paper for a softer look with the woman's box:
Then I stamp my pieces (I used the stitching and verse from the Bind and Stitch set..I love the way the stitches are so crisp!!)
Next I stamped and colored His Little Ones: Praying Boy and His Little Ones: Praying Girl using Copic Markers and cut them out (I wanted their outfits to look fuzzy, so I took the colorless blender solution on a paper towel and dabbed them after I colored them):
Next, I used some left over Petaloo flowers, ctmh opaques, and Michael's ribbon to glue all the items on the boxes:
Now for the inside, this clever box comes with dividers (yes!) and was ready for the cards I had made to fill it with (here are a few samples of those):
So what do you think? Is this a project YOU might do for a Christmas Gift? Remember to Leave a comment to THIS POST and/or on our FACEBOOK page to be automatically entered in our Giveaway! Those prizes that are NOT claimed will all be added into a FINAL GIVEAWAY prize package that will be worth over $100!! So make sure you are commenting each week! You have until SUNDAY MIDNIGHT to comment!
SPEAKING OF CHRISTMAS AND GIVEAWAYS....
GUESS WHO WON OUR DESIGN CONTEST FOR THE NEW Christmas His Little One's stamp set?!!
We actually chose 2 winners, as I used ideas from both of them to make not only HLO stamps but a new full-sized Winter Ruth character, that has the ability to hold several different items!! I can't wait to share these with you but before that, I'm sure you wanna know who won the Free sets!!
Belinda K----You inspired a 4x6 set called Winter Ruth, with a brand new full size character Ruth!! You wanted a character that has the ability to hold different items, and you got it!
and our HLO: Christmas Boy winner goes to...
Jamie M---You suggested Him holding a Christmas ornament (and I've drawn him this morning doing just that!)
Thanks to everyone who gave ideas both here and on Facebook!
NOW DON'T FORGET TO COMMENT HERE TO BE ENTERED TO WIN A PRIZE THAT INCLUDES ITEMS FROM THIS WEEK'S INSPIRED CHRISTMAS CREATION!!
I'll be back Monday to announce the winner!
Be the Blessing!
~Antoinette
www.inspiredstamps.com (Shop our online store: We are shipping most orders the SAME DAY as you place it!)
Subscribe to:
Posts (Atom)